Leigh and Chris'
Pizza Cookbook
Four years later, here's the Web version. The book, imho, was rather nice, with lots of white space and decorations; I'm afraid the Web version isn't quite so pretty.
Introduction
I used to claim that I could live on Chinese food and pizza, and since I've had a pizza stone, the latter has been very nearly true: Over the last six months, I've probably made at least one pizza every week. Obviously, this doesn't entitle me to speak with any authority - my best crust still can't compare with the best local pizzerias - but my pizzas are both tasty and easy to make, so I figured I ought to at least try to share what I've learned.This book is pretty rambly, but I didn't try to give you a set of plug-and-play recipes so much as my feel for the process. The book presents this as a static entity, but my sauce recipe, for example, tends to drift. While the basic form seems pretty constant, I'm always fiddling with times and proportions.
Now, for all I know, you may be a much better cook than I am - you sure are around Mom more! - but I figured it couldn't hurt to be very explicit, and try to write on the basis of ability but not knowledge. If nothing else, this may serve as the basis of a couple chapters of the cookbook I want to write someday - and I've certainly had fun putting this book together.
Basic Overview
To make a pizza, first you make a dough. After it's risen you punch it down, and do the rest of the prep work while the dough rises some more.I've seen pizza recipes that call for rolling right after you punch the dough down, but I haven't tried that yet. The second rising may make for a thicker, chewier crust.Then, you put the cold pizza stone in the cold oven and heat both to ca 425º while you roll out (or toss in the air, if you're more adventurous and/or romantic than I am!) the crust and apply the toppings.
When the pizza is ready and the oven is warmed up (usually I can make a pizza before the oven warms up), sprinkle some corn meal on the stone, slide the pizza on, and cook it until the pieces you snitch off the outside of the crust taste done. When you have a lot of toppings, it can be hard to bake the top of the crust without the cheese starting to char. A possible solution to this may be to put at least some toppings on top of the cheese.
Dough
You have to develop a feel for dough making. This can take a while: my doughs get better steadily, but still don't approach the best local pizzerias. The "right" proportions depend on temperature and humidity. Too much or too little flour, water, or fat will cause problems; with practice, you will learn to recognize the symptoms early and correct them before the dough is over-kneaded.
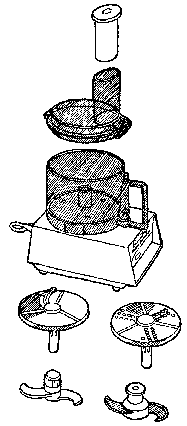
It's so easy to make dough with a Cuisinart that (except for a modicum of 'finishing') I've never really bothered with the ritual of hand kneading. The basic procedure is the same for all doughs (that I've made so far, at least): Dissolve the yeast with half the sugar in a cup of hot tap water. You'll probably find that yeast doesn't dissolve as easily as, say, sugar - and it's even harder to dissolve yeast in milk than in water. Once the yeast is dissolved, set it aside until it starts to bubble, and mix the flour(s) with the salt and remaining sugar (using the metal blade), then grease a big glass bowl and set the oven so it just goes on. (Ideal dough rising temperature is ca 80º to 90º.) When the yeast is bubbling well, turn on the Cuisinart (still using the metal blade) and add the dissolved yeast gradually. When this is mostly mixed, add a little olive oil. (Too much oil and the dough will roll easily but cook up flat and biscuity.) Mix some more, until the dough forms a ball and stops sticking to the sides.
If you get the proportions right, it should be pretty impossible to over- knead the dough. On the other hand, if you start with a little too much flour, and have to add more liquid, over- kneading does become a real danger. An over-kneaded crust is stiff to roll and tastes hard and crunchy, not soft and chewy.
I tend to do a little hand kneading on a floured board, especially when the dough seems a little wet in the Cuisinart. This both gives me a feel for the dough and probably makes for a more stretched than pounded dough. Mostly, I guess I like the way kneading dough feels.
Once the dough is kneaded, put it in the greased bowl; cover it (with plastic wrap, say); and put it in the warm oven. Let it rise for at least an hour and a half, then punch it down (to break up gas bubbles) and let it rise again for at least twenty minutes while you do the prep work. If the dough doesn't rise, the oven was too cold, or the water was too hot; if the dough looks 'foamy', the oven is probably too hot.
My basic dough
This differs from the recipe that came with my stone by replacing one of the three cups of wheat flour with barley flour. I find that the extra barley makes the dough easier to work, and helps make for a chewy, bread-like crust.2 cups wheat flour, 1 cup barley flour, 1 cup hot tap water, 1 tbs. yeast, ca 1 tbs. oil, 2 tsp. sugar, 1 tsp. salt.
On my stone, this tends to make for a relatively thick crust when rolled out as far as can fit on the stone; you may have to scale the recipe up by a third or half for a large, thick-crust pizza.

A 'French' dough
This differs from the above "basic" dough in using milk instead of water. This seems to make for a lighter, chewier crust that works well with a thicker crust. I seem to make it most of the time these days.Instead of using hot tap water, heat a cup of milk in a small sauce pan until it just feels warm. (I have an electric stove and iron pans; the milk will keep getting warmer for a little while after I turn off the burner. If the milk is too much above 90º, the yeast will die.) It will be even harder to dissolve the yeast in milk than in water.
Since whole milk has plenty of fat in it, I don't add any extra olive oil to the dough. With non-fat milk, you will probably need to add some olive oil.
Other grains
I often find a plain wheat/barley dough a trifle boring, and tend to use a cup of generic wheat flour, a cup of barley flour, and a cup of either whole wheat, stone ground wheat, rye, or buckwheat flour. (I've tried rice flour, but it didn't work well - no gluten?) A cup of rye or buckwheat seems to be just about the right proportion; you definitely taste it, but it's not overwhelming. The dough seems rich; not heavy. Rye will make the crust slightly bluish gray while a buckwheat dough will be lighter and flecked with black.
The local supermarkets seem to think they're being complete if they offer whole wheat and stone ground wheat flour in addition to bleached and unbleached "all purpose" flour - I buy rye and buckwheat in bulk at the health food store. Similarly, while you can buy packets of yeast in the grocery store, a health food store may have it in bulk, at a much lower price.
Making Pizza
Rolling Dough
Rolling a dough ball out to a rectangular shape isn't quite as easy as rolling it out to a round or elliptical shape, but it's not impossible, either. I roll the ball into a cylinder by hand, then use the rolling pin to flatten it until it's a bit larger than the pizza stone. Be sure to flour the board before rolling the dough, and to make sure the dough doesn't stick to the board as you roll it. (I roll and assemble my pizzas right on the peel (the thin pastry board you use to slide the pizza into and out of the oven) and shake the whole thing periodically to be sure the dough slides freely.) Don't forget, too, that the bottom of the dough will soak up flour as you construct the pizza: A dough that slides when you're done rolling may not slide when you're ready to put it in the oven. When this happens, I push and pull the sides until it comes free - sometimes I use a big knife to try to free sticky spots at the center.
Once the dough is rolled out, I crimp up the edges by rolling them over twice, flattening them down, crimping them back up to a roughly triangular cross- section, then flattening that to a roundish edge. This seems to do an adequate job of making the edge a single piece of bread, not just some thin layers wrapped around each other.
The pizza can be a little wider than the stone without disaster, but no more than a quarter inch or so. The pizza can similarly stick a little beyond the ends of the stone; I find I often have to scrunch the pizza up a bit lengthwise to get it to fit. Your pizza stone is significantly bigger than mine, so you might not have any problem.

A simple pizza as big as my stone will feed two adults with reasonable appetites, while a pizza with a lot of toppings can be stretched to four, with salad or bread. Since your stone is bigger, you may be able to make single pizzas that will feed four.
Construction
So far, I've built all my pizzas pretty much the same way. It works for me, but you may want to experiment a bit more.Having rolled the crust, I put on a little sauce. (For a "white" pizza, I just 'wet' the surface with a little (maybe a tablespoon of) olive oil.) If you put on too much sauce, the toppings slide off, so I generally use just a bit more sauce than is necessary to (more or less) uniformly cover the dough.
I add the toppings on top of the sauce, and then I put the cheese on top of the toppings. Anything that I'd grate or chop anyway, like garlic and basil or oregano, I chop into the cheese: I chop the additives in the Cuisinart, grate the cheese (I usually use a mozzarella- romano blend) onto it, then chop it all together until it looks like commercial grated parmesan.
Hint
If you are going to be home, you can start the dough at least two hours before you want to eat, and then do something else while it rises. On the other hand, you can make a dough the night before (after dinner, say) and just put it in the refrigerator after letting it rise a bit after you punch it down. It will be a little harder to roll out, but you probably won't notice much difference once it's baked.
Hint
When you have company, you can assemble a second (or third or ...) pizza while the previous one is cooking. It's hectic, and it takes a second peel (or cutting board big enough to hold the hot pizza) but it can be done, and you'll even get to have a piece or two of the first pizza after you assemble the third, while the second one is cooking.Tomato Sauce
Canned Tomatoes
Unless you have very good fresh tomatoes, canned "peeled tomatoes" will probably make a better sauce. I never try to make sauce with supermarket tomatoes.
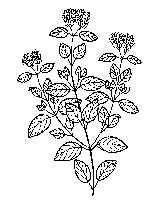
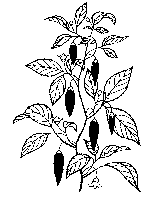
Three or four 28-oz cans of peeled tomatoes in juice; one 6-oz can tomato paste; one or two average sized bulbs of garlic; from four jalapeno peppers (for a mild sauce) to twelve serrano peppers (for a rather hot sauce); lots of fresh or dry oregano; maybe a half cup of olive oil; maybe some red wine; maybe some basil, mint, celantro, anise seed, black pepper, and/or cumin.
Chop the garlic and peppers in a Cuisinart; add the oil, and puree. Add a can of tomatoes, the oregano, and the optional flavors (if any), and puree some more. Add this to a pot over medium high heat. Stir occasionally while you puree the tomato paste with a can of tomatoes and the liquid from the other can(s), then stir in the paste/tomato puree. Chop the tomatoes from the remaining can(s) rather coarsely, and stir them in. Bring to a simmer over medium low heat, reducing the heat gradually.
When I'm having noodles, I will often start the water for the pasta as soon as the sauce comes to a simmer. (Sometimes I make a very fast, one can variant where I start the pasta water when I put the tomato-garlic-pepper-oil in the hot pot.) In any event, I rarely let my sauces simmer even as long as an hour, with two hours being about the limit. More simmering tends to make for a thicker sauce (as does refrigerating it at least overnight) but it doesn't taste as 'fresh' - this is especially important with volatile herb flavors, like basil, celantro, mint or (to a lesser extent) oregano. Especially with volatile herbs like fresh basil, I often bring the sauce to a simmer and only add the herbs a few minutes before the sauce is done.
Fresh Tomatoes
Just like for canned tomatoes, except no tomato paste, and almost no simmering. This tends to make for a watery sauce, but one that tastes like fresh tomatoes - and basil!I haven't had a lot of opportunity to experiment with sauce-less pizzas as 'real' fresh tomatoes have just started appearing at the farmer's markets, but you can, in effect, make the sauce right on the pizza by mixing coarsely chopped tomatoes with finely chopped garlic, peppers, and lots of fresh basil and oregano. One problem here is that it ends up very watery: I think I'll try draining the chopped tomatoes in a colander before putting them on the pizza.
Pizza Suggestions
Garlic, extra cheese
During college I acquired a taste for pizza with garlic and extra cheese, and afterwards this became the pizza I'd order the most, partly because it was something I could share with Tané, who's a vegetarian.I use one to one and a half normal size bulbs (I mean the whole thing, not individual cloves!), a pound of mozzarella, and maybe three ounces of romano. As per the Construction section, I chop the garlic and the (one or two half cups of fresh) oregano, grate the cheese, then chop these together. A few leaves of rosemary will give the pizza a richer, more complex and subtle flavor. I put sauce on the dough; the cheese and garlic on the sauce; and that's that.
Sliced fresh tomatoes between the sauce and the cheese go very well with this, as do sliced mushrooms and/or jalapeno or serrano peppers.
Basil Pizza
The basic garlic pizza, easy on the cheese, with a lot of basil substituted for most of the oregano. Mixing the basil in with the cheese seems to work better than any pesto pizza I've ever had.Red Clam
Basically just a garlic pizza, easy on the cheese, with one or two 10 ounce cans of whole clams (drained) between the sauce and the cheese.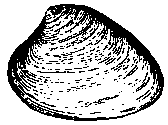
White Clam
Hold the sauce: just smear a little olive oil all over the dough. Add a couple drained cans of clams, cover with ca half a pound of cheese with plenty of garlic and oregano. Delicious, and a good candidate for a very thin crust.You can try to get away with a single can of clams, but that makes the clam taste a bit too subtle for me. I've tried using a can of clams and a can of oysters, and I don't recommend it: Canned oysters are even less assertive than canned clams!
'Geek Salad'
Under the influence of Tané, I've acquired a real bias against 'salad' pizzas with 'too many' toppings, but this is a damn good combo: fresh tomatoes, mushrooms, feta cheese, (optional) olives, garlic, oregano, one half to three quarters of a pound of mozzarella cheese with the same 'half wedge' of romano.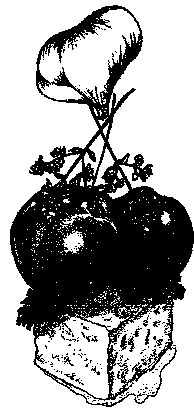
Calzone
I tend to avoid rye and buckwheat in my calzone doughs, preferring the light, easy-to-work wheat and barley crust. Sometimes I use one part barley flour to two parts wheat flour; other times I use one part barley to one part whole wheat and one part 'generic' wheat flour.Roll the dough out as big and rectangular as you can, then put the stuffing on one side, leaving about an inch of crust on the outside edges, then fold the other half over, and seal the edges by crimping and squeezing, just as if you were making a raised edge on a pizza. Bake at a slightly lower temperature than normal, perhaps 400 - and don't forget to cut a few slits in the top for steam to escape! If the stuffing goes a bit over the center-line, you may not be able to crimp the edge - but you should be OK so long as the top comes down to the inch-wide border and you can fold that up over the top.
My favorite commercial calzone is just ricotta, mozzarella, and basil leaves. On the other hand, I've enjoyed calzones made with sauce, mushrooms, garlic chopped into the cheese, and even a variant of the 'geek salad' pizza. In general, you can't put quite as much in a calzone as on a pizza.
Cleaning the stone
The pizza stone is porous, so you must never wash it with soap - otherwise soap will seep into the stone, and your pizzas will taste soapy!After baking a pizza, let the stone cool down with the oven. When you can handle it with your bare hands, scrape off any spills with a knife or spatula, and rinse the stone in warm water. I wrap mine in a light cotton towel (an old "receiving blanket", actually) to keep it clean and protect it from scratches.
Encouraging words
Don't be discouraged if your first crust or three has all the chewy goodness of a FedEx envelope: they'll get better steadily - and most people will just rave about how good it tastes, and will regard any deprecating comments about the crust as 'mere' perfectionism!
Copyright © 1992 and 1996 by Jon Shemitz (jon@midnightbeach.com), all rights reserved
